Export SQL Server Data as CSV Files and Migrate to Amazon S3 Bucket using AWS CLI
In this tutorial, I want to show SQL Server database administrator and SQL developers how I recently migrated about 300 GB data from SQL Server database tables into Amazon S3 bucket folders considered as Data Lake using AWS CLI commands within a SQL job automatically.
Since the data amount was big and the resources on the data source SQL Server instance were limited, like the disk capacity, CPU, etc. I preferred to export data from SQL Server in CSV format into local disk with suitable amounts and move this exported flat files into Amazon S3 folders using the AWS Commnad Line Interface tool.
I hope SQL database professionals will find interesting the solution demonstrated here and applicable for their requirements too.
I believe there are more advanced solutions but the solution I share in this SQL Server tutorial is easy to implement and possible with basic permissions and authorizations especially on AWS side.
My aim is to export the SQL Server data source table in csv file format into a local folder and then using AWS CLI copy command copy the file to an Amazon S3 bucket folder. The exported data will be deleted from the source table because there is limited disk space on the database server. The SQL job actually manages data migration from SQL Server database to Amazon S3 Data Lake by using the steps that will be explained below.
Since to interact with AWS CLI commands and with Windows OS commands like file rename and delete tasks, on SQL Server instance xp_cmdshell procedure should be enabled. Of course, first of all AWS CLI Command Line Interface should be installed on the SQL Server machine. I have referred to some tutorials within this article, please review these documents before you start developing your data migration solution.
On SQL Server database I have created a staging table for the data source table. This second table, or the staging table has the same structure with the original database table.
SQL Server database developers can easily create one staging table using the following "SELECT ... INTO ... FROM ..." SQL query.
select * into StagingTable from SourceTable where 1 = 0;
I created a copy of the original data source table which is empty initially as below. I plan to move specific number of data rows from the source table using "SELECT TOP N" query into staging table. I preferred to move TOP N records because a SQL Select query could possibly execute for a longer time than TOP N queries.
![]()
SQL developers has completed the first step by creating the staging database table.
Since I am planning to move SQL data in small file junks (actually each CSV export file had a size around 1 GB), I guessed I will have more than 300 CSV files at the end of data migration.
For naming of the CSV files, I decided to use a fix name followed by a three digit numeric value, like "filename001", "filename002", ..., "filename300", etc.
Each execution of the SQL Server job will create a single file and name the CSV file by using the value stored in a database table.
This file number counter table can be created easily using below CREATE TABLE command. And insert the initial value 1 which will help SQL developer to name the first file dynamically.
create table fileid (id int);

insert into fileid select 1;
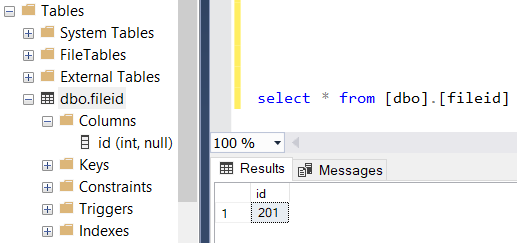
At this step of SQL job development, we can start with data selection and inserting into staging table.
Here is a screenshot of the SQL Server data migration job step
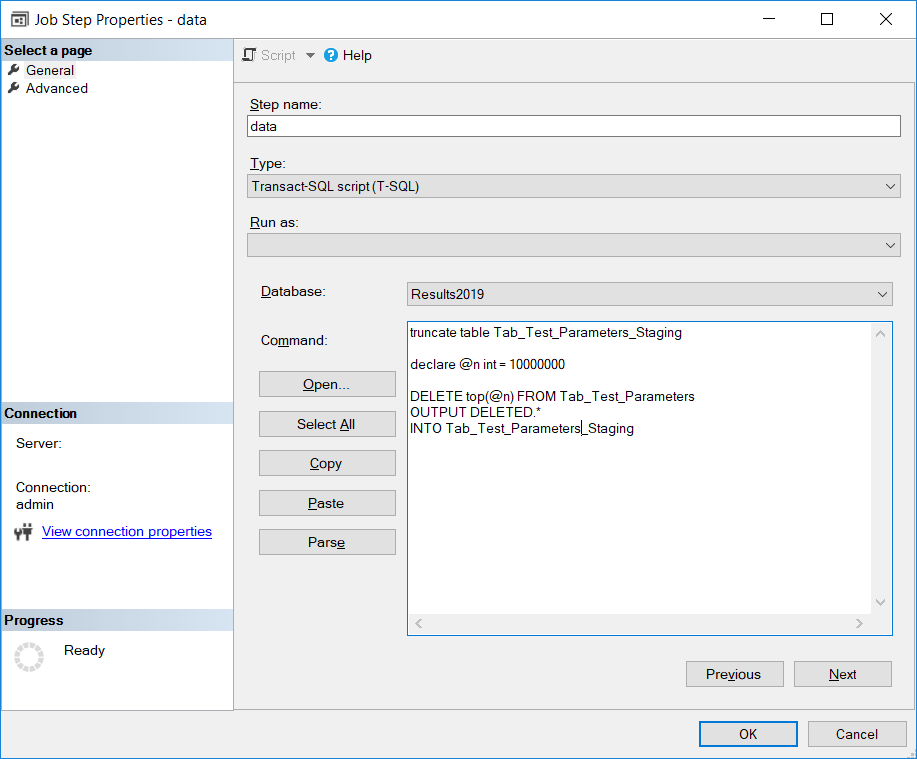
If it is required to explain the SQL code below, actually first SQL developers have to clear the staging area by truncating the data in the staging table.
Then a SQL variable is defined with a default value which identifies how many rows from data source will be exported in each loop or in each execution of the SQL Server job. I preferred to export 10 million rows into CSV files.
For database developers, please note that I use DELETE command with OUTPUT clause in this statement.
If you are not familiar with OUTPUT clause usage on SQL Server, I can suggest database programmers to read first the tutorial SQL Server SQL OUTPUT Clause Sample Code with Insert, Update, Delete Statements
truncate table Tab_Test_Parameters_Staging


declare @n int = 10000000


DELETE top(@n) FROM Tab_Test_Parameters

OUTPUT DELETED.*

INTO Tab_Test_Parameters_Staging
The advantage of using DELETE command with OUTPUT clause is SQL developer can delete top N rows while moving deleted data into staging table without any requirement of a WHERE clause.
As you can guess, after data in staging table is exported in CSV format from SQL Server, we will truncate staging table and remove processed data from source database in a persistent way.
Now database developers can export data stored in staging table.
Using SQL Server Management Studio aka SSMS, developers or administrators can create export task ans save it as a local SSIS package.
In this SQL Server job step, database professionals can choose the step type as "SQL Server Integration Services Package" and then select the export task package which they have created.
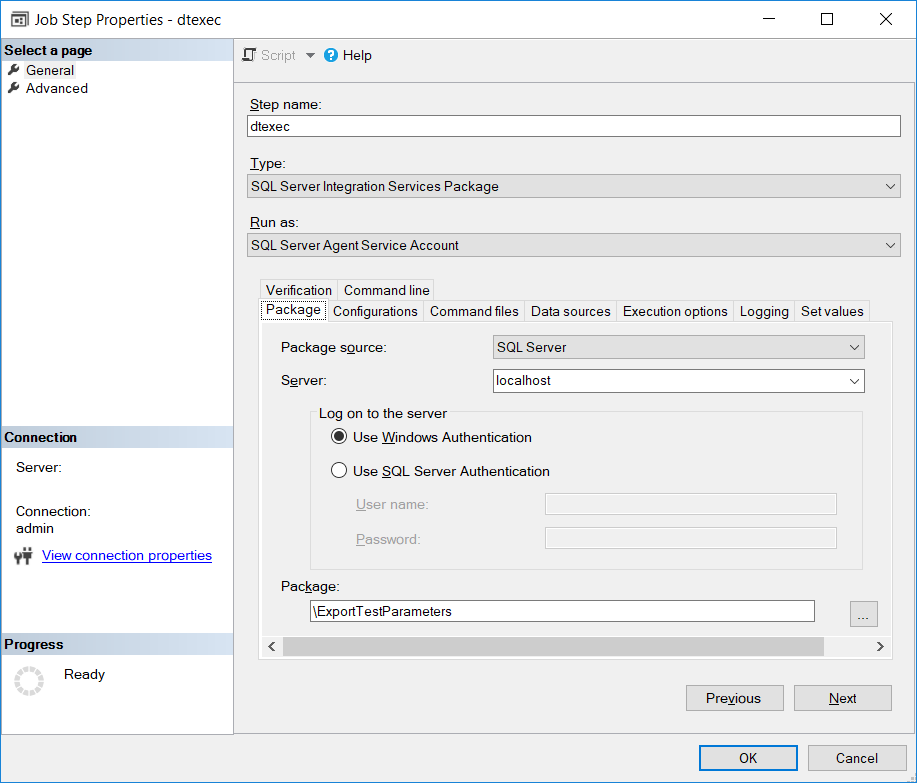
Here at this section, I briefly talked about this step.
In fact, before you continue with this solution be sure that the data exported as CSV file can be used by the consumers of the data.
Because while exporting data, you will make some selections like code page of the data file, delimiter selection, text qualifier, etc.
For example, on AWS if you plan to migrate data into an Amazon Redshift Data Warehouse, note that you need the data in UTF-8 encoded.
Since this SQL job deletes data from data source table after it is exported into CSV file, you might lose a lot of time and data too if the data consumer cannot import data as expected.
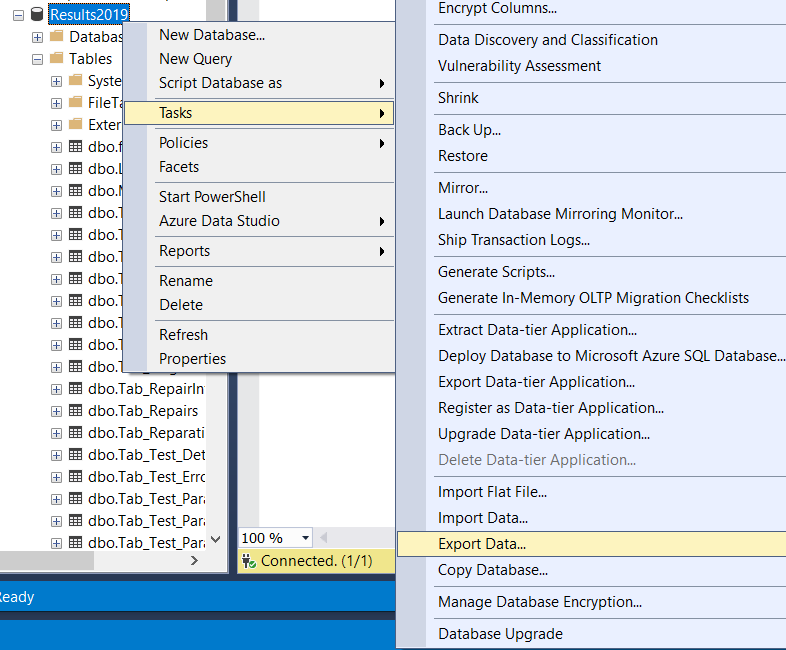
To create a data export task on SQL Server database using SQL Server Management Studio (SSMS) right click on the database name and follow context menu options:
Tasks > Export Data ...
This selection will launch the SQL Server Import and Export Wizard
Using SQL Server Native Client, choose your source SQL Server database as the data source.
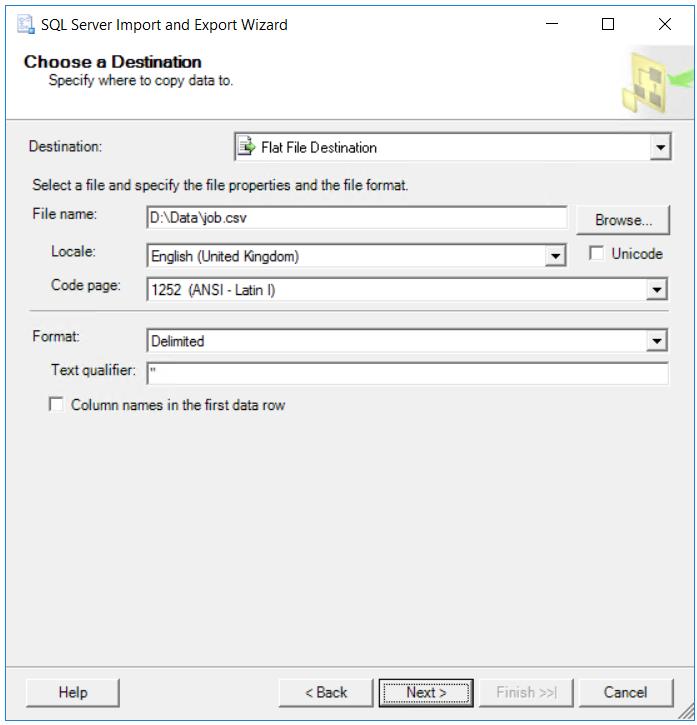
For destination, choose the output folder, default name for the flat file and configure your CSV output data.
Please verify your configuration results with the data consumer.
You may repeat this configuration several times for the correct settings for your data.
For example, text qualifier may not be required. Or you might have to escape it in your data source query.
In the following screen of the wizard, I prefer to write a query to specify the data to transfer instead of choosing table or view option. This is because if the data to be exported included the text qualifier itself, it has to be escaped. I manage such data related issues using SQL query. For example in below SQL query, the text qualifier quotes are replaced with double quotes with REPLACE function.
select

 ID, TestId, ParameterId,

 replace(ParameterValue,'"','""') ParameterValue

from Tab_Test_Parameters_Staging
In the following steps of the export wizard, developers should define the row delimiter and column delimiter characters.
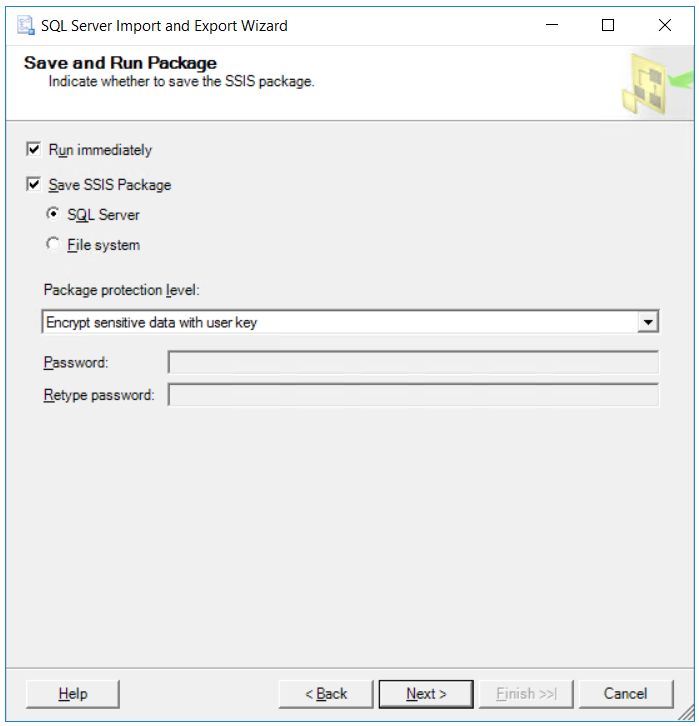
The final step enables the export task creator to save this task as an SSIS package actually as a SQL Server Integration Services package.
After you are sure about your data migration development, you can save this data export task as an SSIS package and use in the migration job.
Now we have a CSV file generated automatically by data export task job step and stoted in the specified data folder.
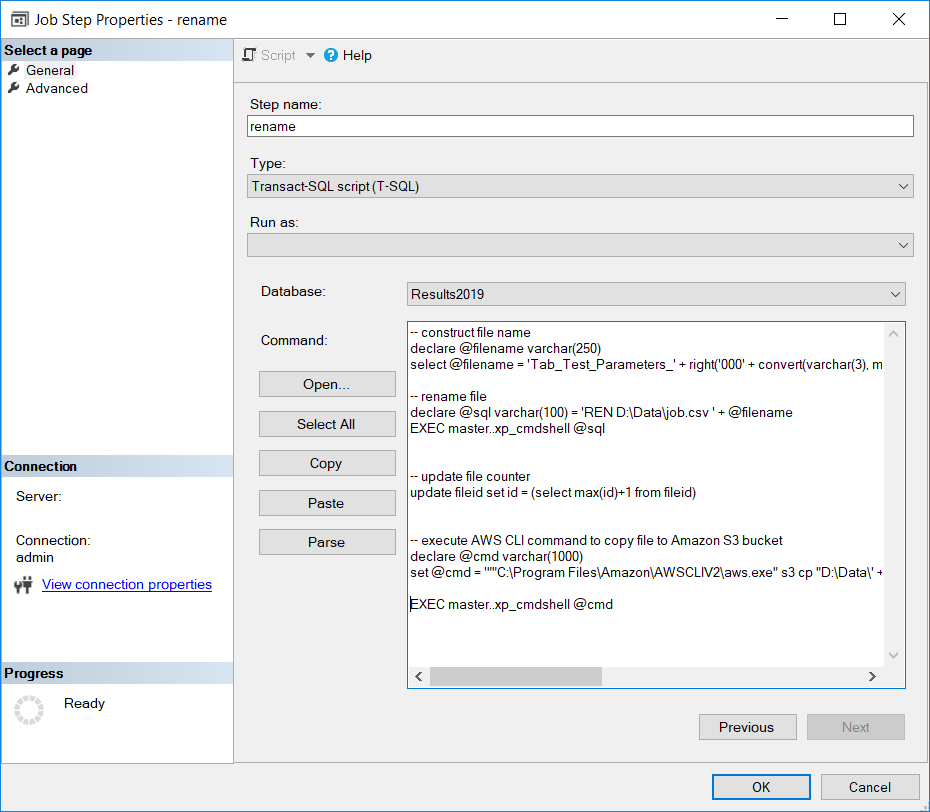
Since the csv file is created with a fixed static name, we have to rename it by reading the file counter table. After the file is renamed, SQL Server developers can call AWS CLI commands to copy data file into Amazon S3 bucket.
SQL developers can cover these task in a single SQL job step.
Let's go one by one.
First let database programmer to read the counter and construct the csv file name by executing the SELECT query on fileid table.
Please note while building the file name I concatenate a constant text with the counter number using zero padding in SQL.
-- construct file name

declare @filename varchar(250)

select @filename = 'Tab_Test_Parameters_' + right('000' + convert(varchar(3), max(id)),3) + '.csv' from fileid
Of course after the file name is built, using SQL Server xp_cmdshell command database developers can call command prompt application and execute batch scripts and commands like rename command REN
As stated previously, to run xp_cmdshell within SQL code scipts, database administrators should enable xp_cmdshell on SQL Server instance. Please refer to database tutorial named How to enable xp_cmdshell on SQL Server using sp_configure
-- rename file

declare @sql varchar(100) = 'REN D:\Data\job.csv ' + @filename

EXEC master..xp_cmdshell @sql
After the renaming the data export file is completed, let's update the file number counter using SQL Update command
-- update file counter

update fileid set id = (select max(id)+1 from fileid)
And finally we are at step where SQL Server developers will call AWS CLI (Command Line Interface) tool in order to copy renamed data export csv file into Amazon S3 bucket folders.
At this step, again database developers have to execute SQL Server xp_cmdshell command.
But this time, we will launch AWS CLI and call S3 Copy command
I prepared an other tutorial for SQL Server developers showing how to enable execution of AWS CLI commands within SQL Server using xp_cmdshell and troubleshooting basic problems. Please refer to Execute AWS CLI Command using xp_cmdshell on SQL Server Database
-- execute AWS CLI command to copy file to Amazon S3 bucket

declare @cmd varchar(1000)

set @cmd = '""C:\Program Files\Amazon\AWSCLIV2\aws.exe" s3 cp "D:\Data\' + @filename + '" "s3://mybucket/data/' + @filename + '""'


EXEC master..xp_cmdshell @cmd
After this step, database programmers can realize that we have created the export csv files and their number is increasing after each job completion. Since after the AWS copy process is completed, we don't need these csv files in local server, we can delete them from the local data export folder.
I decided to add a new step as the first step of the SQL job, which deletes the previously created file.
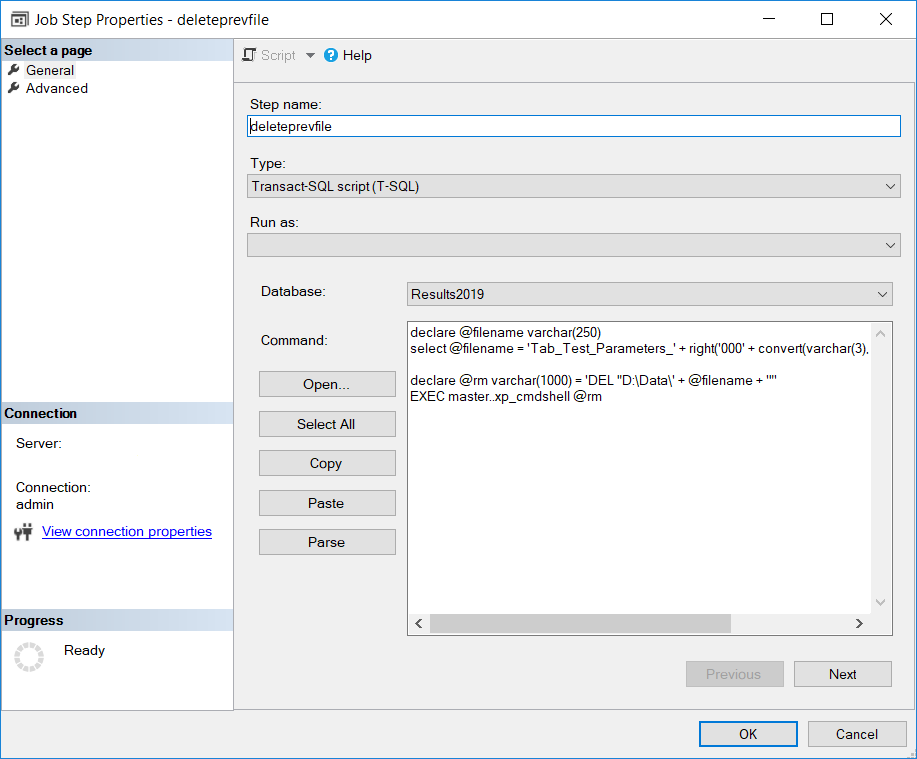
To decide which file to delete, I read the counter table and substruct 1 for previous filename. Finally I execute SQL Server xp_cmdshell command to interact with operating system commands like DEL delete command.
declare @filename varchar(250)

select @filename = 'Tab_Test_Parameters_' + right('000' + convert(varchar(3), max(id)-1),3) + '.csv' from fileid


declare @rm varchar(1000) = 'DEL "D:\Data\' + @filename + '"'

EXEC master..xp_cmdshell @rm
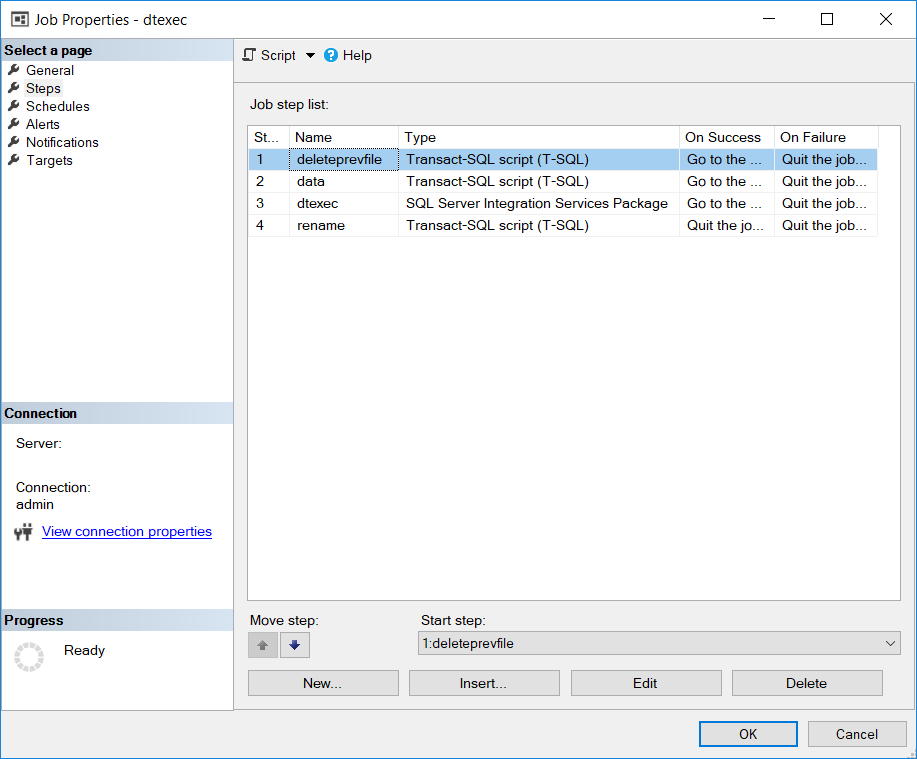
Now, we have completed all job steps and tried to summarize why each step is created for and shared SQL codes with developers. Below is the overview of job steps. SQL Server professionals can see the job steps in order.
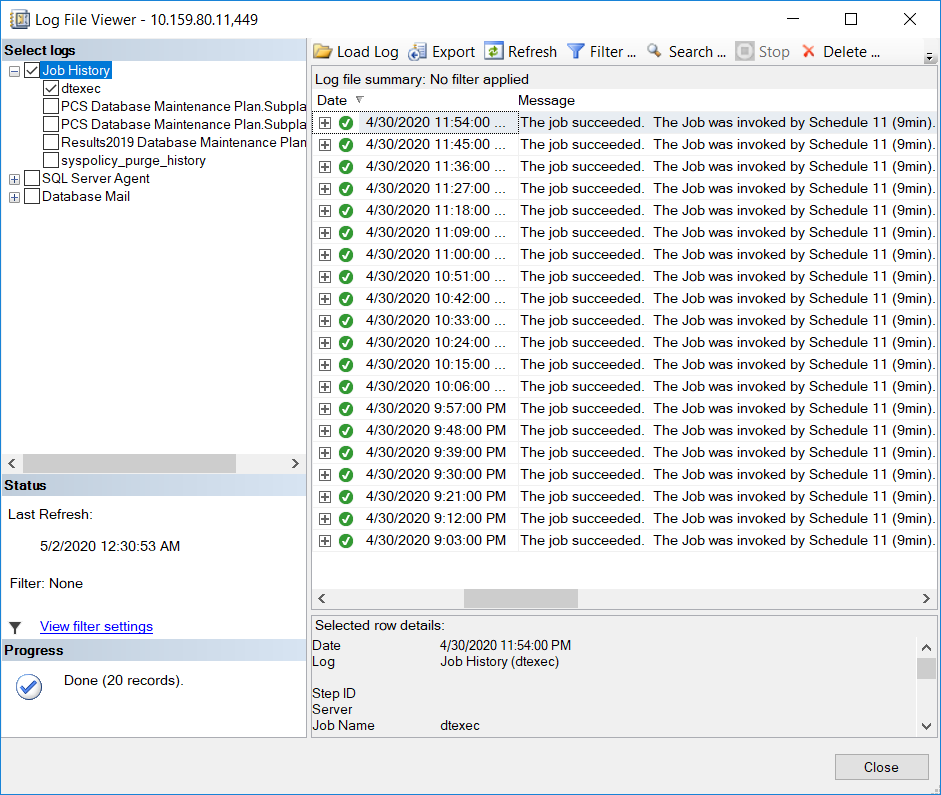
After running the SQL job a few times manually, I calculated the time period that each job execution takes and scheduled the SQL Server job according. You can review the SQL Server data migration job execution history on SQL Server Management Studio easily.
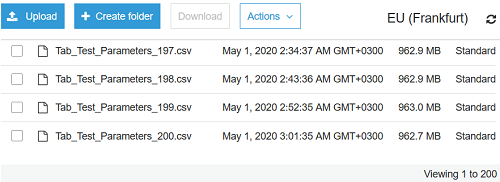
AWS users can check if the files are successfully copied into target Amazon S3 bucket folder. I have already copied 200 files by data migration SQL Server job exporting database content in CSV format into a local folder and then using AWS CLI command into Amazon S3 bucket.
