Connect Denodo Platform Databases using Knime Analytics Projects
This Knime tutorial shows Knime Analytics Platform developers to connect Denodo Data Virtualization platform databases using Denodo JDBC driver and Knime DB Connector node. In your Knime projects, if you are required to connect to Denodo databases, you can configure Denodo database driver preferences and then create Denodo database connection using DB Connector node easily as shown in this tutorial. It is important to use the JDBC URL template shared in this Knime tutorial for a successful database connection to Denodo platform from Knime projects.
This analytics tutorial shows Knime Analytic Platform developers how to connect Denodo data virtualization platform using JDBC step by step.
Launch Knime Analytics Platform software as the first step.

Create Database Driver for Denodo on Knime
Since Denodo is not a natively supported data source in Knime, we have to define manually the customizing of database driver for Denodo and connection properties of Denodo database connections.
When you open the development IDE of Knime, using main menu follow the options "File > Preferences"
On Preferences window, switch to Databases section displayed under KNIME as seen in below screenshot.
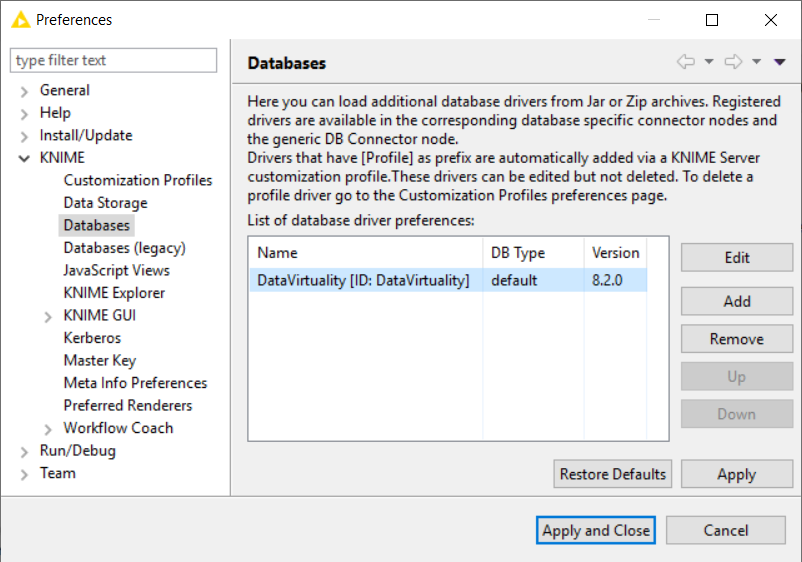
If you have not created the database driver settings for the Denodo Platform before, it will not be listed in list of database preferences.
You can see Data Virtuality data virtualization platform is listed but not Denodo in my Knime IDE.
Click Add button to create the database driver settings for Denodo Data Virtualization Platform.
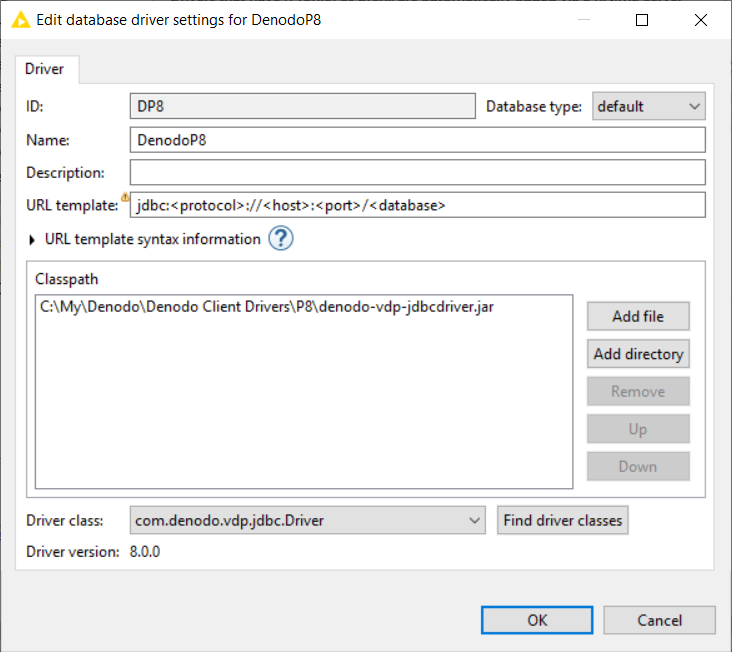
Now, let's populate below configuration page for Denodo database driver on Knime.
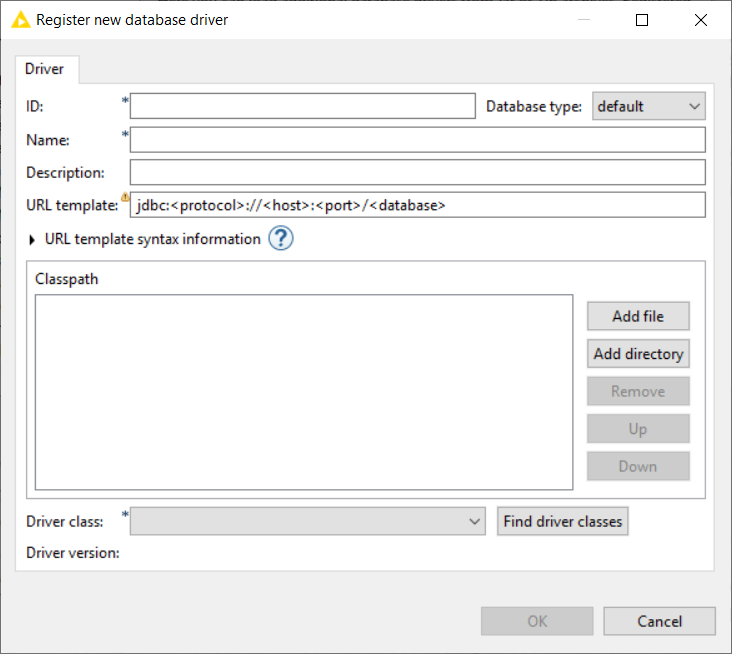
Populate following entries as described
ID: Type a short code for database driver that will remind you Denodo, for example "DP8"
Name: Type a name for Denodo database driver, for example "DenodoP8"
URL template: Keep the default URL template suggested, "jdbc:<protocol>://<host>:<port>/<database>"
Classpath: Using Classpath setting we will select and map the JDBC database driver used to connect Denodo platform.
Before you continue with this step, you should have download the Denodo JDBC drivers into your local computer in a folder.
I keep the denodo-vdp-jdbcdriver.jar in "C:\My\Denodo\Denodo Client Drivers\P8" folder.
So click on Add file button.
Navigate to folder and select the Denodo JDBC driver file denodo-vdp-jdbcdriver.jar and click Open button to continue and return to previous screen.
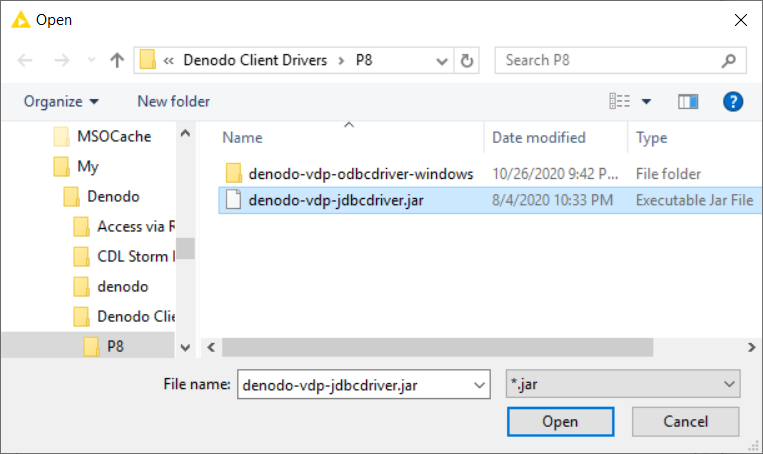
Driver class: When you are back on "Register new database driver" screen, press on "Find driver classes" button. This will populate the driver class combobox.
![]()
For Denodo Platform 8 database connection JDBC driver, there is only one driver class which will automatically be selected and displayed as follows
![]()
After this step click OK button to finish database driver definition and close this screen to return back to previous databases preferences screen.
After definition is completed, Knime users will see the Denodo database driver defined in below Database Preferences page. On that screen, if you want to change the driver settings like updating the database driver files with a new version, you can click on Edit button.
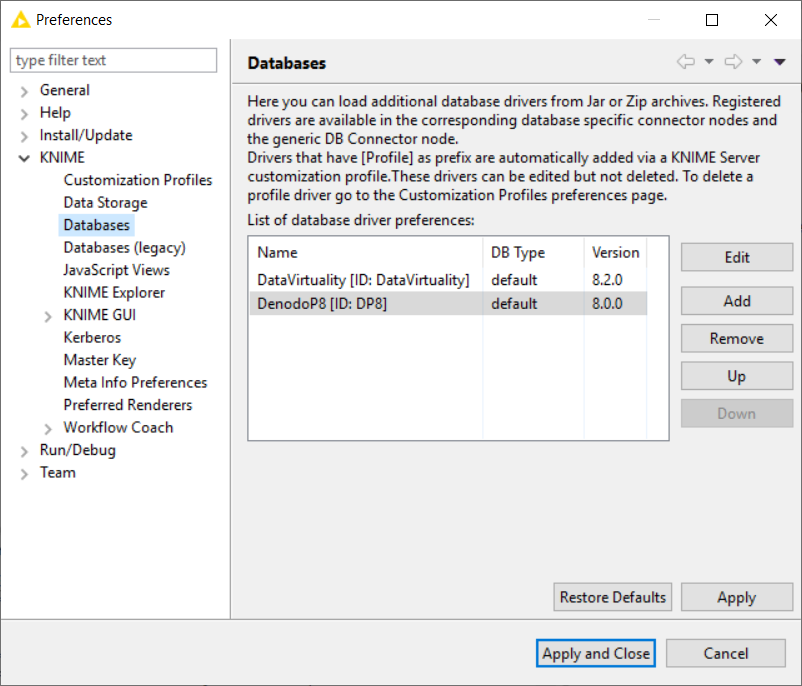
You can click Edit button to modify Denodo database driver settings if required.
Once the database driver settings are configured, we can now define our first Denodo connection within Knime Analytics Platform.
Create Database Connection to Denodo from Knime Project
After the Denodo database driver configuration is completed, Knime users are now ready to create a new Knime project and define the first Denodo database connection in their Knime project.
Launch Knime and create an empty Knime project.
On Node Repository window, select the DB Connector object which is listed under DB > Connection
Knime users can use DB Connector node to create database connection to any data platform using JDBC database connection.
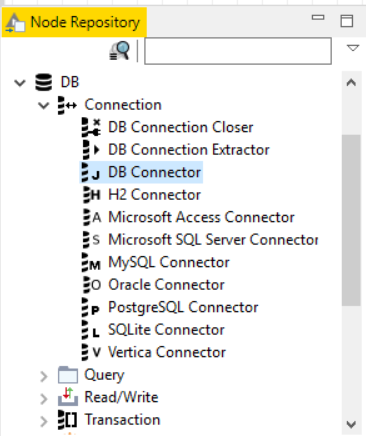
Double click on the DB connector node to add it to the Knime project.
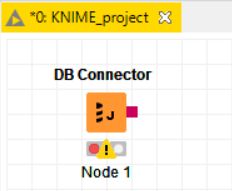
Right click on the DB connector node and select option Configure for database connection settings to Denodo Platform
Knime users can keep "Database Type" as "Default"
"Database Dialect" can be left default as "SQL-92"
On the Driver Name combobox, select Denodo P8 which we have created in previous step.
The Database URL is the JDBC database connection URL which Knime developers will use to identify the Denodo Data Virtualization Platform to connect.
The JDBC "Database URL" for Denodo databases can be created as follows:
jdbc:vdb://host:port/database
For "host" you can use the IP address or the host name of the Denodo server.
"Port" is 9999 by default.
And if you have not yet created a database on Denodo Platform, you can connect to "admin" database with administrator credentials.
If you have created additional databases on Denodo instance, you can use one of those databases as target datbase to connect in JDBC URL
For Authentication, Knime users can use the "Username & password" option for example.
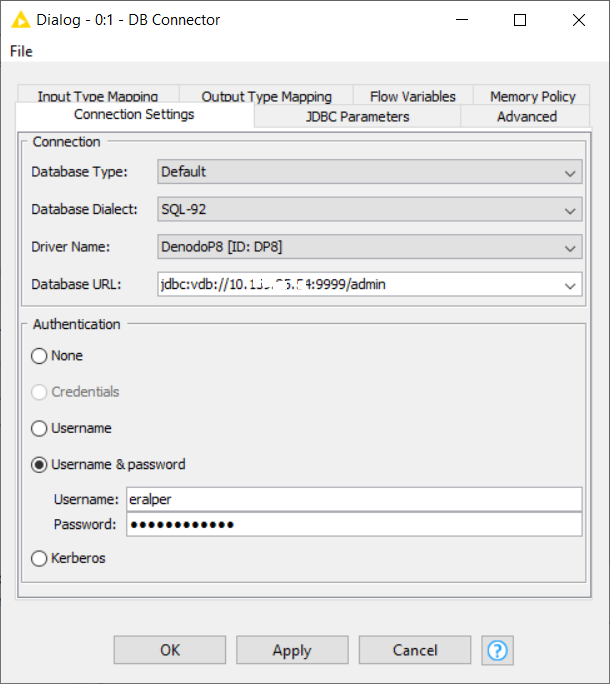
Click Apply and OK buttons to save the Knime to Denodo database connection settings.
On your Knime project, select DB Connector node and right click for context menu. Then select Execute to establish database conncetion from Knime Analytics to Denodo Data Virtualization Platform.
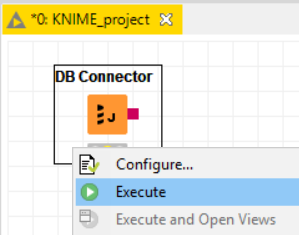
If everything is fine and configured correct, you will see the green light on the node. Otherwise, an error message will be displayed to debug the error case on the console for Knime developers.
I hope this Knime tutorial is useful for Knime developers who require to connect to data virtualization platforms like Denodo Platform 8 using a custom JDBC driver setting for the target database and using DB Connector node for database JDBC connection URL.
