Connect Denodo Data Virtualization Software from DBeaver Database Management Tool
In this tutorial, DBeaver SQL Database Management tool users will see how to define JDBC Driver for Denodo Platform and how to create database connection to Denodo databases. Denodo is one of the leading data virtualization sollutions on the market and DBeaver is one of the most common universal database management tool. So it is important to connect Denodo from DBeaver application. In this guide, I want to summarize the steps of a successfull connection to Denodo Platform 7.0 database from DBeaver tool.

If you are not using DBeaver Universal Database Manager and SQL Client tool, data professionals can download and install DBeaver by following the instructions given at Download and Install DBeaver Database Manager
Create Denodo Database JDBC Driver on DBeaver
First of all let's start with launching DBeaver, free universal database management tool for the SQL community.
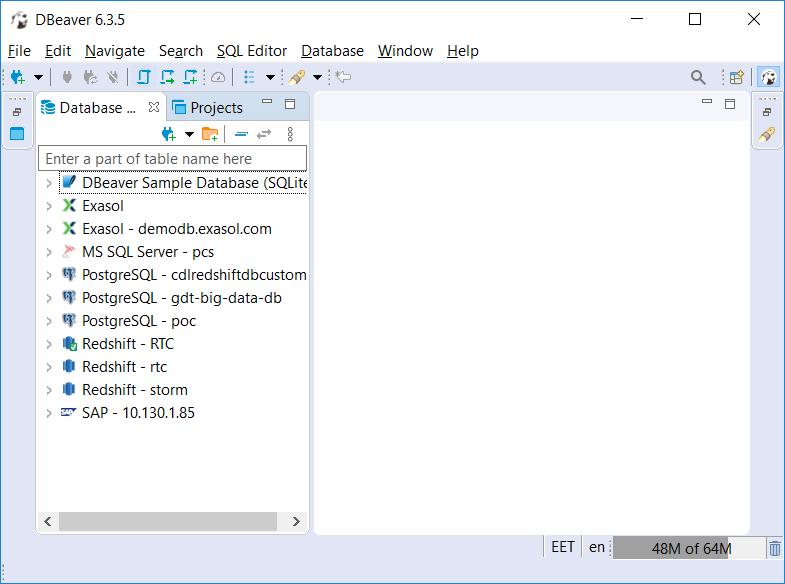
I assume DBeaver users will be using the Denodo for the first time. So the Denodo database driver has not been created yet. So follow the instructions listed below:
Using the top menu, follow the menu options: Database > Driver Manager

Let's start to create a new driver definition for Denodo Platform 7 by pressing New button
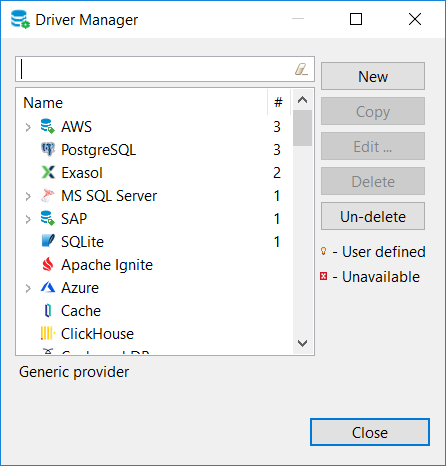
DBeaver administrators or DBeaver SQL users require to populate following driver details for creating a new Denodo driver
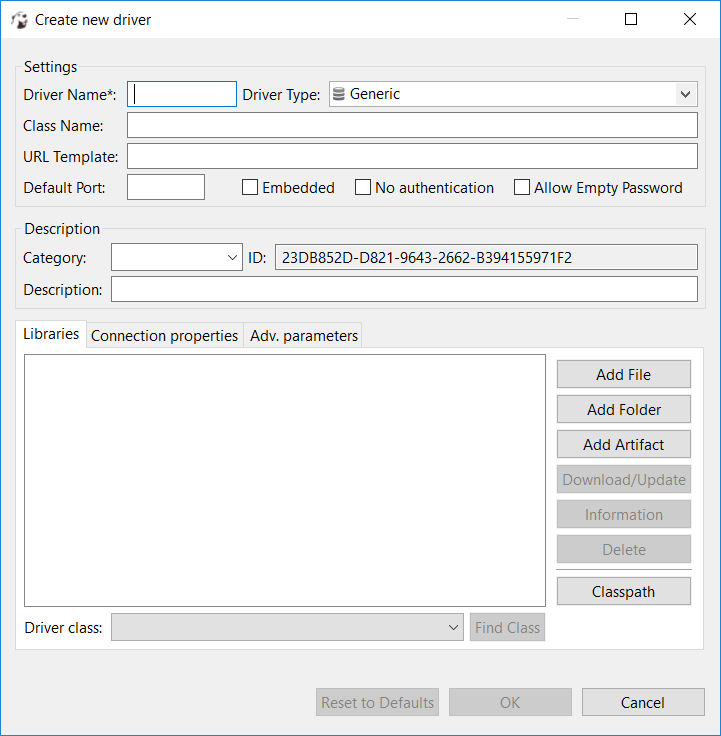
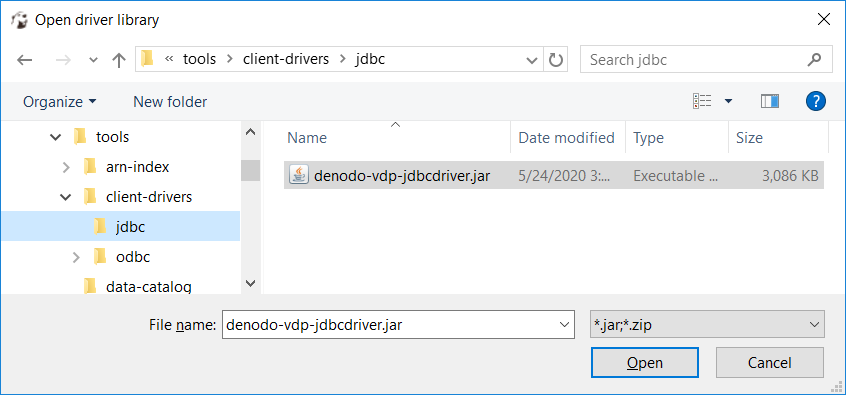
First, select the Denodo database JDBC driver file using Add File button
Goto following folder and select the denodo-vdp-jdbcdriver.jar file and press Open
C:\Denodo\DenodoPlatform7.0\tools\client-drivers\jdbc
Please note that in my installation the $Home folder of the Denodo Platform 7.0 application was configured as "C:\Denodo\DenodoPlatform7.0"
You the exact location of the denodo-vdp-jdbcdriver.jar Denodo JDBC driver file is:
$DenodoHome\tools\client-drivers\jdbc
After the driver file is selceted, click on the Find Class button

This will list two driver classes, choose the first one:
com.denodo.vdb.jdbcdriver.VDBJDBCDriver and
com.denodo.vdb.jdbc.Driver
Type a descriptive name like Denodo for the Driver Name
As URL Template use following value:
jdbc:vdb://{host}:{port}/{database}
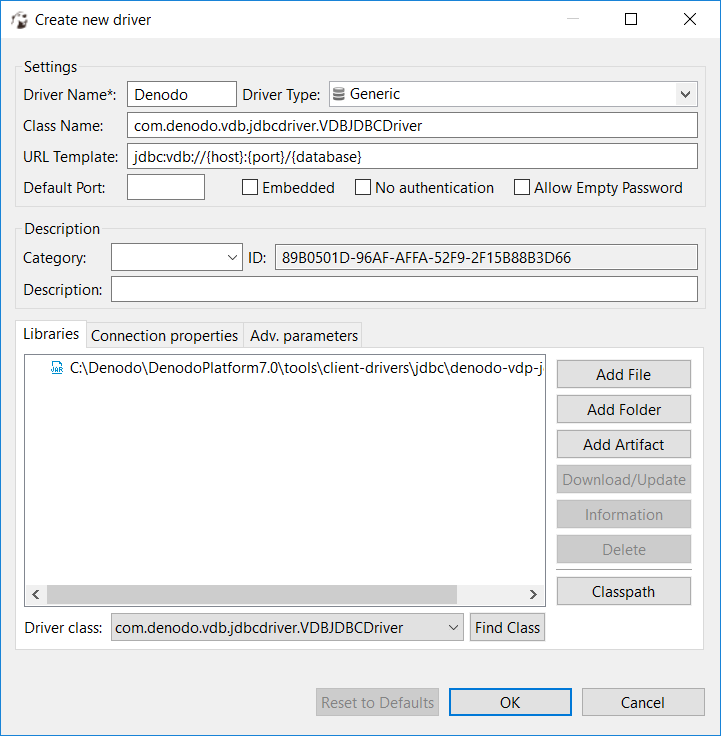
Click OK to save the new driver definition which will enable DBeaver users to create database connections to different Denodo installations.
Now the new Denodo driver is listed in the Driver Manager screen
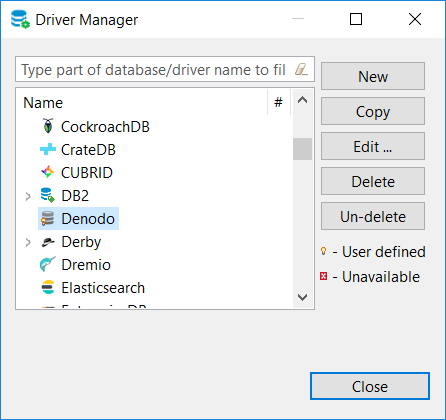
Click Close
Create Database Connection to Denodo from DBeaver SQL Tool
Now we can create a new database connection to target Denodo Platform using the new driver definition
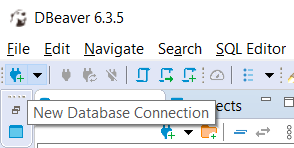
Click on "New Database Connection" icon
In first screen, type the Denodo name when the All category is selected.
This is the database driver class we have defined in previous section
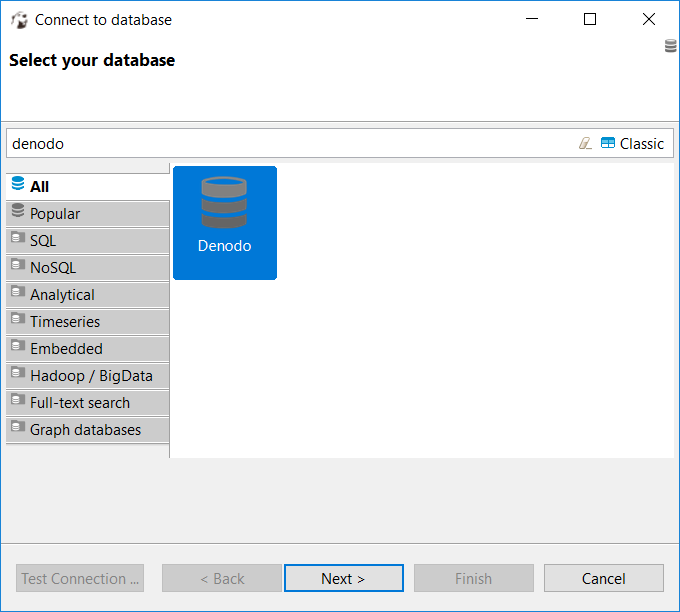
Click Next to populate Denodo JDBC connection settings details on DBeaver screen seen below
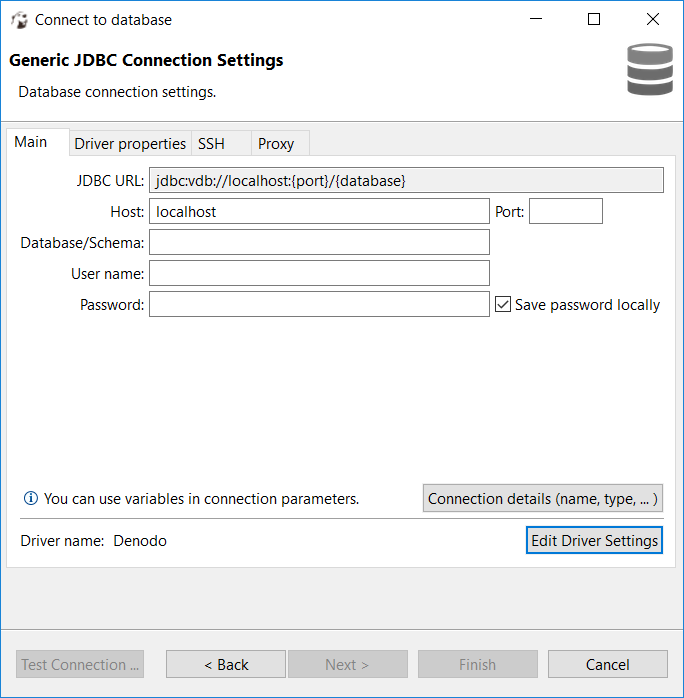
Now fill following connection properties for the target Denodo Platform connection:
Host, Port, Database, User name and Password
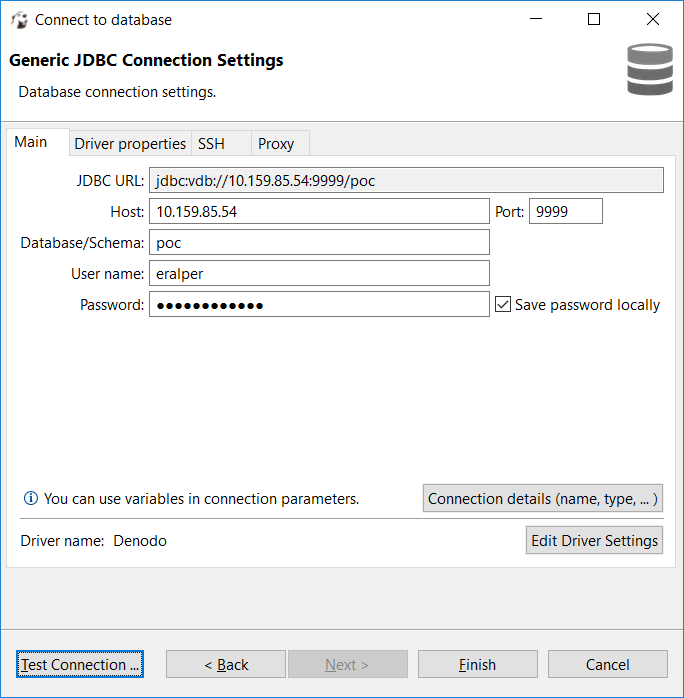
Click on Test Connection button to validate the provided information for a new Denodo Platform database connection over JDBC
As seen below the connection test is successful
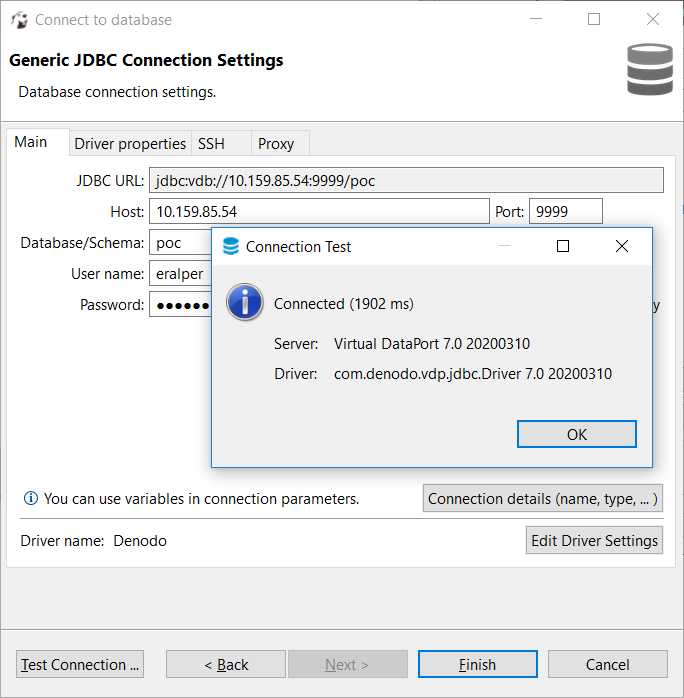
Click OK
Click Finish to save the Denodo database connection using the Denodo JDBC driver
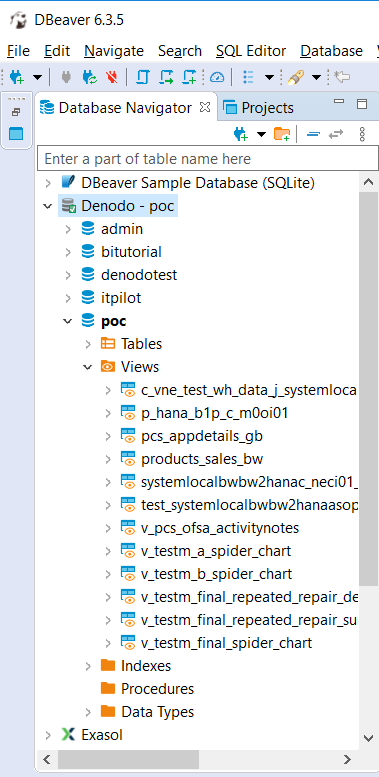
If you click the new Denodo connection and drill down the database tables and views, you will have a similar view seen below
The base views on Denodo Platform are seen as database tables in DBeaver.
The business views created on Denodo Platform for data modelling are listed as database views on Denodo
This is a sample view of the Denodo data virtualization content on DBeaver database management tool
I hope DBeaver SQL users and Denodo Platform data virtualization users find this tutorial helpful to identify and solve the problems that might occur during JDBC driver creation for Denodo and creating JDBC database connection to Denodo Platform databases.
