Connect Data Virtuality from Microsoft Excel
In this data virtualization tutorial, I would like to show how Microsoft Excel users can connect to Data Virtuality server using ODBC connection. In most companies, Excel is still the most common tool for professionals to display, report and analyze data. So it is very important to know how to connect to different data sources for your Excel sheet including the data virtualization platforms like Denodo and Data Virtuality which provide access to different data resources acting just like a data hub.
As the name implies Data Virtuality is a Logical Data Warehouse solution which combines different types of data sources, either transactional, analytical or streaming data sources, structured, semi-structured on not structured data. Because of their capabilities, I found it very important to establish a connection from Excel to Data Virtuality or other LDW platforms.
Create Data Virtualization ODBC Data Source
Since we are going to use Excel's ODBC Data Sources for Data Virtuality connection, first we have to define the ODBC connection on the computer where Excel is running
According to your Excel's edition you can either define the ODBC connection among 64-bit or in 32-bit ODBC data sources.
I will continue with 32-bit in this data virtualization and Excel guide
Launch ODBC Administration for 32 bit as administrator to establish your Excel to Data Virtuality connection
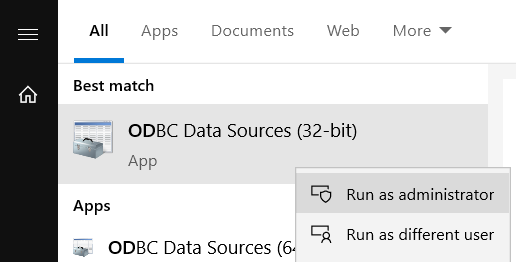
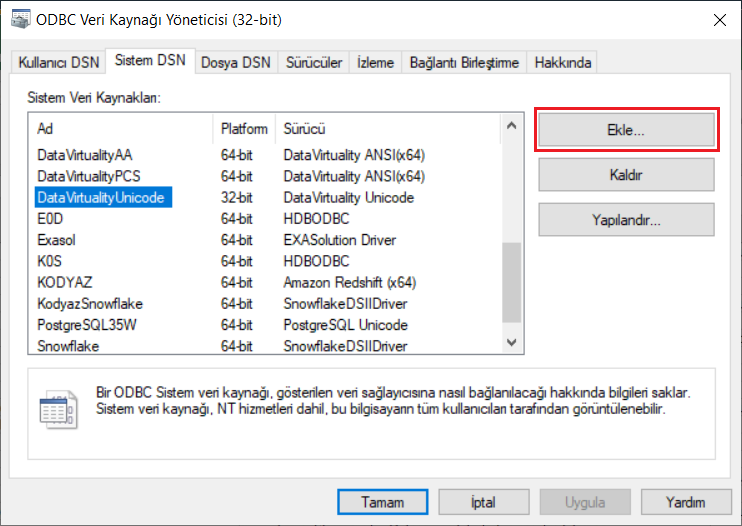
When ODBC Administration tool is launched please switch to System DSN tab. Then click Add button to create a new DSN entry. Since my setup is in Turkish, you see "Ekle" in following screenshot.
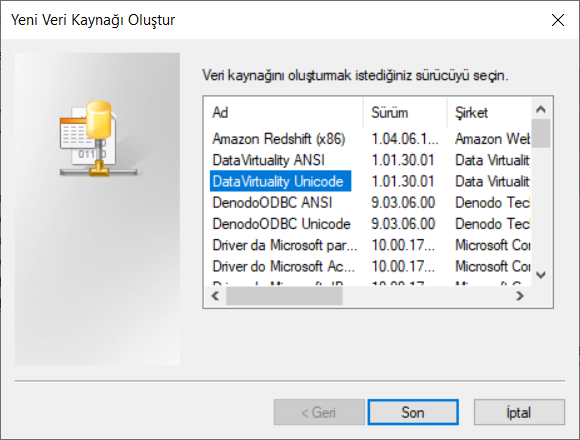
While creating a new ODBC data source, first thing we should do is selecting the appropriate connection driver.
Choose the "DataVirtuality Unicode" driver to continue with following configuration steps.
If you have not yet dowloaded and installed the Data Virtuality ODBC drivers, please visit Data Virtuality Drivers for most recent ODBC and JDBC drivers for download.
After driver selection on following screen we will provide connection details to define Data Virtuality ODBC connection
As seen in below screenshot, provide a descriptive short name to your ODBC data source for target Data Virtuality server.
It is possible to provide more details using Description textbox.
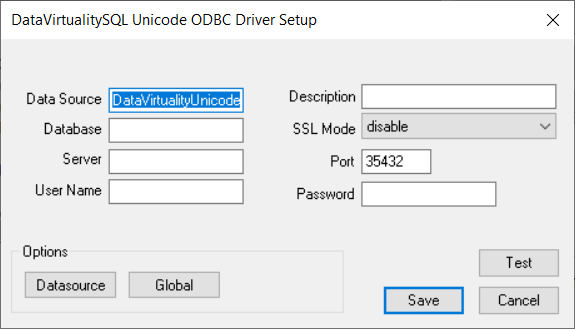
Database name is by default "datavirtuality".
Server is the IP address or the host name of the target Data Virtuality server which you want to connect from Excel sheets.
Username and password are the required valid credentials that can connect to Data Virtuality application.
If the server accepts TNS connection you can select it from the SSL mode
Port number changes from SSL mode selection and whether the Data Virtuality is running on a Windows or Linux OS (operating system)
ODBC connections are using ports 35432 or 53433 port numbers.
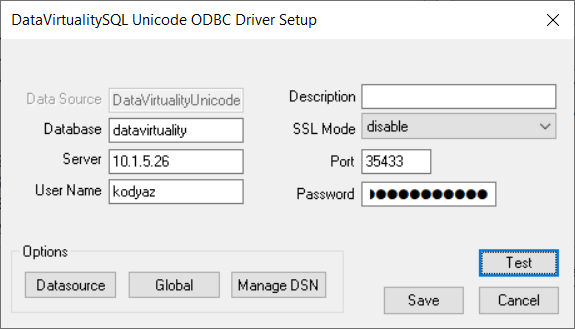
After Data Virtuality server and valid credentials are entered, we are ready to validate connection using Test button.

After ODBC DSN connection is created for the Data Virtuality server is created, MS Office Excel users can now consume data from logical data warehouse platform Data Virtuality within Excel sheets as illustrated in following section.
Access Data Virtuality in Excel
In order to connect Data Virtuality from Excel to display and import data into Excel from LDW for further analysis following steps can be taken.
Launch Excel
When empty Excel document is displayed, switch to Data menu tab
On the Data menu ribbon, click New Query button
As seen in following screenshot, Excel users can import data from ODBC Data Virtuality connection into Excel workbook.
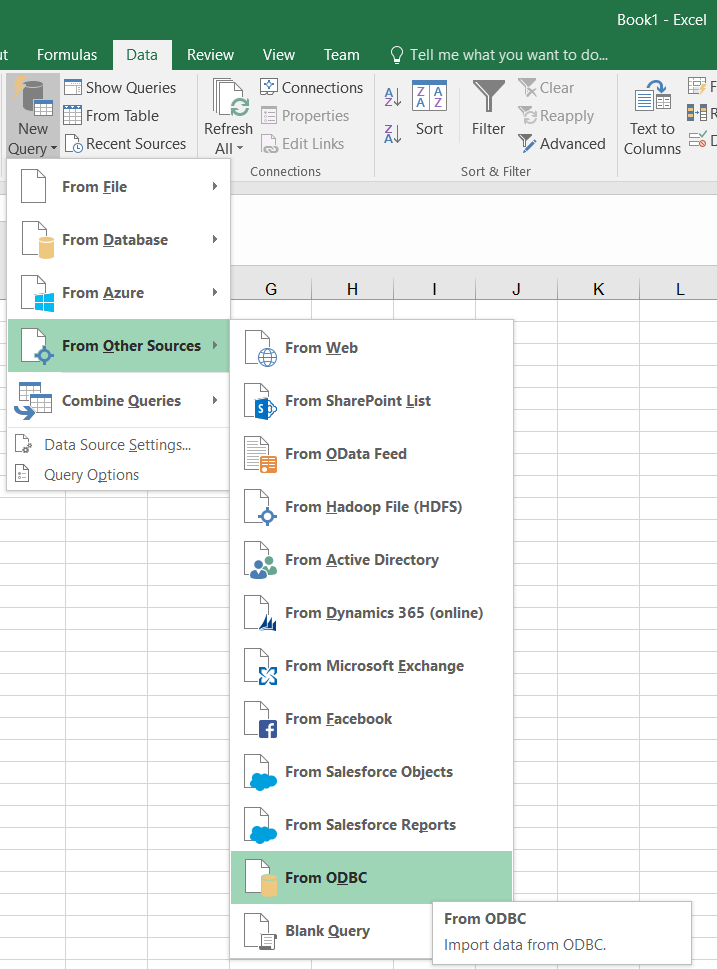
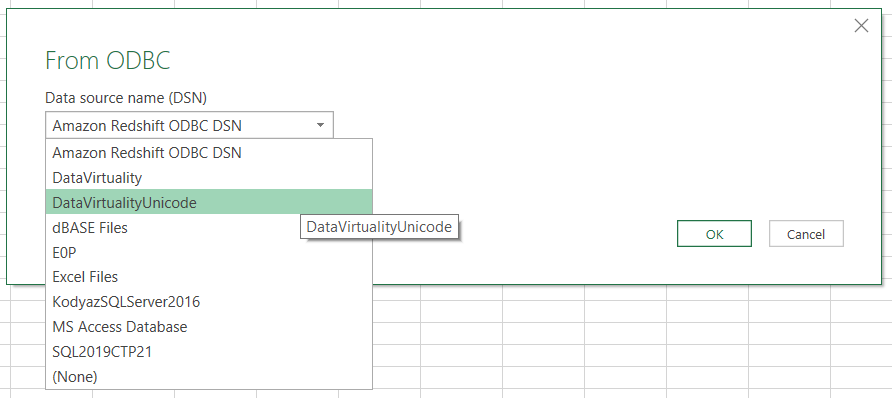
Select the 32-bit ODBC data source that we have created for accessing Data Virtuality server in previous section in this tutorial.
After wew select the ODBC data source where we will consume data from, we also have to provide the valid Data Virtuality credentials for this connection.
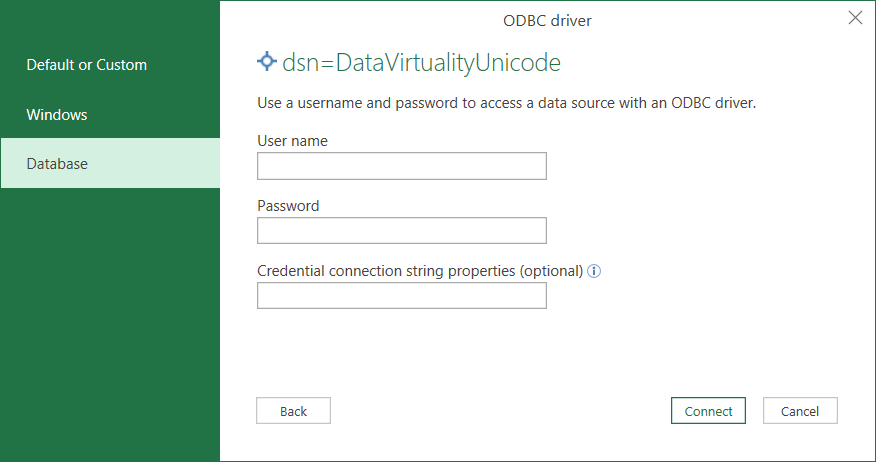
Then Excel users are ready to click Connect button and start reading data into Excel from Data Virtuality.
If Data Virtuality connection is established the data sources, tables and views that exist within logical data warehouse platform are listed for you to select and import data.
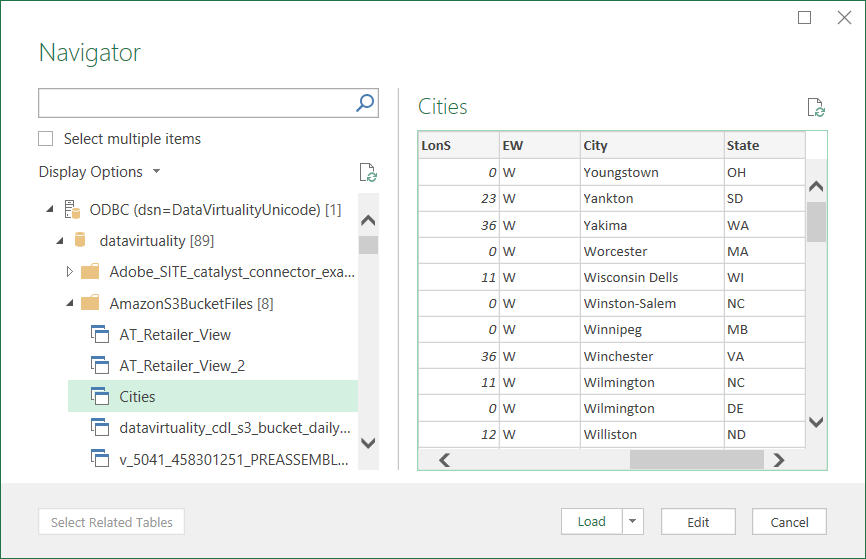
Choose the data source or virtual schema created on Data Virtuality and select the target table or view to be queried.
It is possible to preview the data source.
When you selected the target table/view after validating it is the data that you need, click Load button.
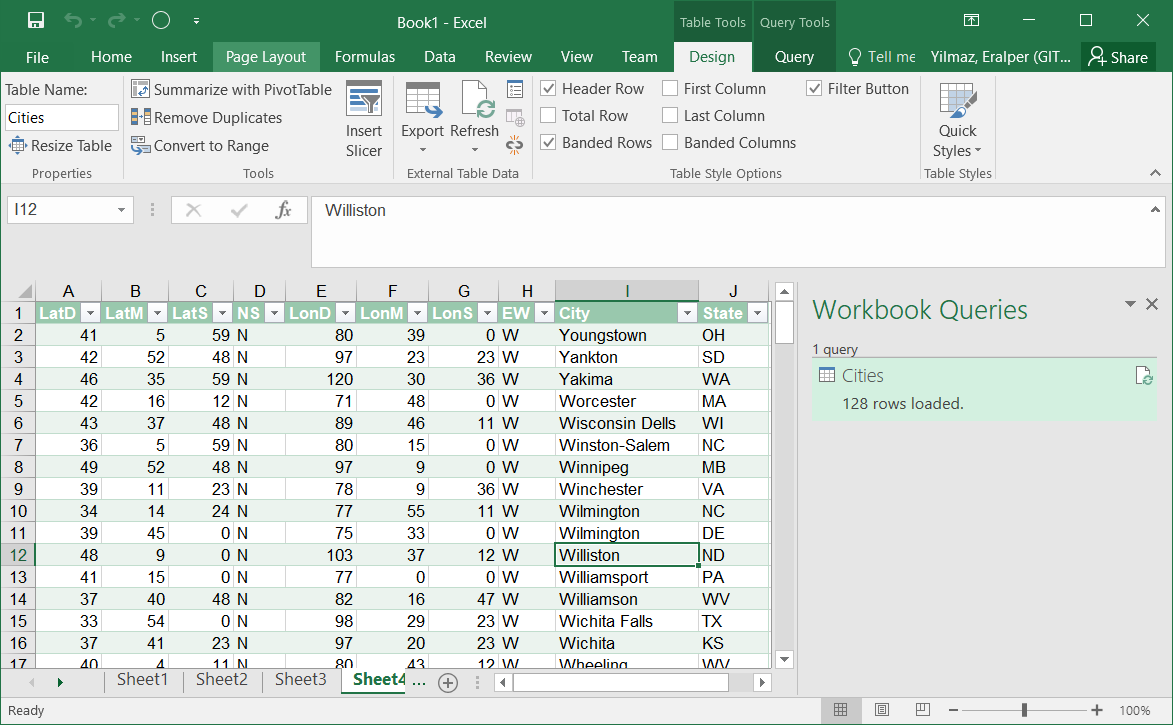
As Microsoft Office Excel users see in above screenshot, by following the steps given in this tutorial, it is possible to analyze and report data from Data Virtuality within Excel sheets.
