Change Windows 10 File Explorer Default Folder Option
The default folder Quick access displayed when File Explorer is launched on Windows 10 loads slowly and does not help my navigation to reach file folders that I frequently use. So I decided to change the default file folder by changing the File Explorer settings on Windows 10.
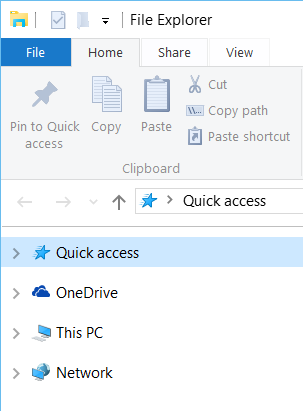
Whenever I click on File Explorer program to display my C drive for example, File Explorer on Windows 10 launches Quick Access by default as starting folder.

Unfortunately, I'm not happy with this default behaviour. Because in general Quick Access takes time to load and I specifically use certain folders for my folders like root C drive, etc.
If you want to change the startup folder for File Explorer on your Windows 10 PC like I do, you can configure File Explorer settings easily.
First launch Windows Explorer aka File Explorer application on Windows 10.
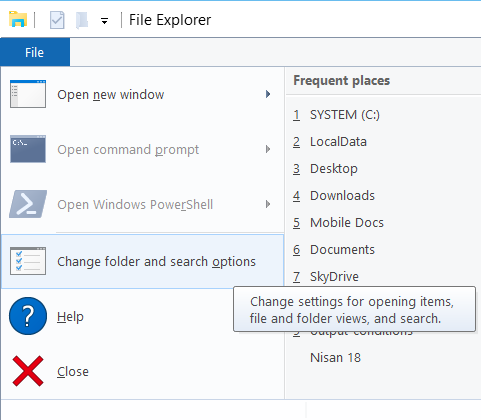
As seen in below screenshot, click on File tab.
A list of menu options will be displayed.
Click on Options or Change folder and search options menu item.

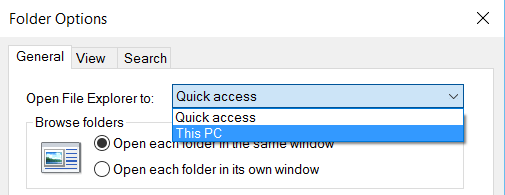
In Folder Options dialog windows, on General tab you will see an option named "Open File Explorer to"
This dropdown lists the possible places that the File Explorer will display by default when it is launched.
You have two options here.
Quick access or This PC

By using this option, Windows 10 users can change default folder for File Explorer from Quick access to This PC option or vice versa.
