SAP Smartforms Tutorial - Create Smartforms Example
Here is an SAP Smarforms tutorial for ABAP developers showing with a simple Smartforms example case to create smartforms documents.
This is a Smartforms tutorial on how to create your first Smartform document.
Open SAP Smart Forms by calling the transaction code smartforms.
smartforms transaction code will display the following SAP Smart Forms: Initial Screen.
In this screen, you can list and display existing smartforms applications or create a new smartform report.
We will create a new smartform so type a new title for your smartform in the Form text area.
I named "ZSMARTFORMS_SALES_DOCUMENTS" to my smartform.
Then click "Create" button to let SAP Smartforms to build our form in its initial state.

Start building the smartform object by calling the Ctrl+F3.
And select "Local Object" for creating your first smartforms document as a local object.
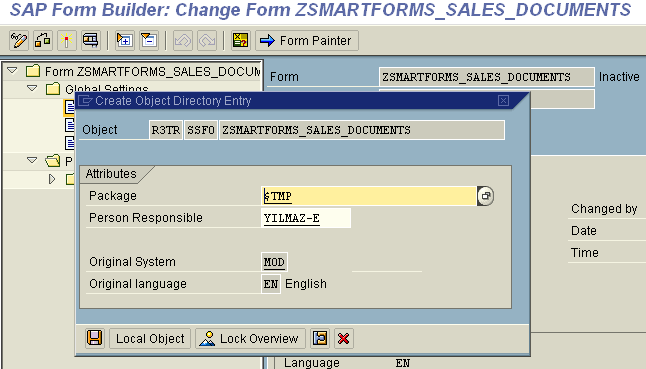
After building the smartform, press F8 to execute the SmartForm document and display its initial state.
First screen will display the Function module for your smart form report.
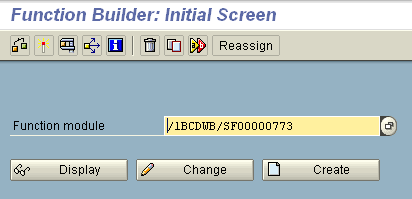
Press again F8 to continue processing SAP smartform document.
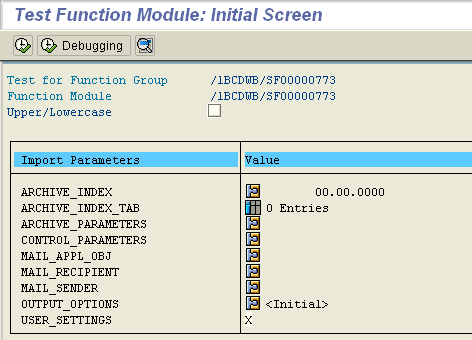
Continue pressing F8 for the next screen where you can select the output device for your SAP Smartforms report.
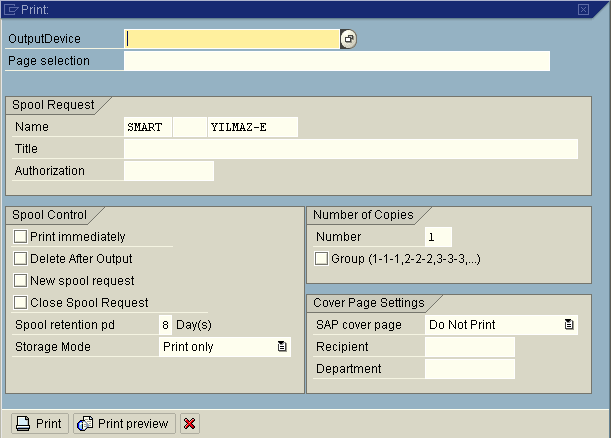
In the OutputDevice text input area, type "locl" and press ENTER, this will return to "Windows-Standard (local)" after you enter locl and press enter.
Then press F8 in order to display your blank SmartForms report output on your screen without sending it to a printer.

If everything goes as normal till this displaying print preview step, we can now continue to create our first SAP Smartforms document.
Press F3 until you go back to SmartForms design screen. This will take 4 times pressing F3 (Back) function key.
For the first SAP Smartforms example smartform document, I plan to get data for the report within the report.
Because of this simple sample smart form tutorial, I will not call the smartform document from an other ABAP program or report.
Thus, I will not use the Form Interface which is necessary when ABAP developers can use for data transfer from outside the sap smartforms application.
By the way, the Form Interface settings can reached by following the "Global Settings > Form Interface" path and then go to Tables tab and you can define interface tables for your requirements.
To keep this How-to build your first SmartForms document tutorial, I plan to display a range of VBAK SAP table contents with its order details from VBAP sales table with page break between two VBAK header items to display each sales document on a page of its own.
Let's start to create first SAP Smartform document.
Click on the Global Definitions tab of your Smartform.
Smartforms Global Definitions Types
First, I will code in ABAP for Types declaration.
These type declarations will help me define table variables and work area structures in the Global Data section.
In order to define TYPES declarations, goto tab "Types" and copy the ABAP code below:
TYPES:

ty_t_vbak TYPE TABLE OF vbak,

ty_t_vbap TYPE TABLE OF vbap.
Smartforms Global Definitions Global Data
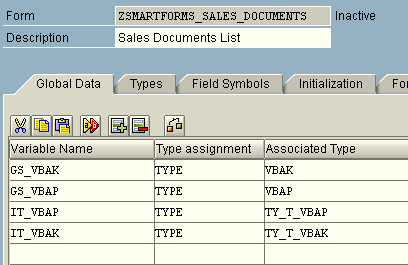
Now, go to Global Data tab and create global table variables and data structures as work areas.
Table variables will store report data in SAP Smartform and work area or data structure will be used during loops to keep loop data.
Copy the below ABAP code into the Global Data section.
Smartforms Global Definitions Initialization
Now, we are ready to create report data we want to display using SAP Smartforms.
I will select a range of sales documents according to their vbeln numbers.
I select data from VBAK for sales document headers and VBAP for sales document items.
SELECT * FROM vbak INTO TABLE it_vbak

  WHERE vbeln GE '0100000004'

  AND vbeln LE '0100000010'.


  CHECK it_vbak[] IS NOT INITIAL.

  SELECT * FROM vbap INTO TABLE it_vbap

    FOR ALL ENTRIES IN it_vbak

    WHERE vbeln = it_vbak-vbeln.
Smartforms Main Window
After we are finished with Global Definitions for data types, variables and initial data, we can now continue with Smartform elements for displaying results.
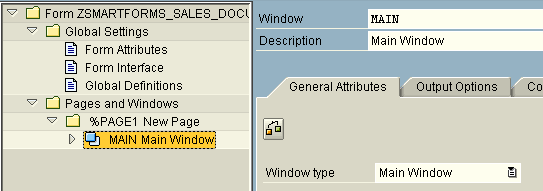
Follow the below path :
Pages and Windows > %PAGE1 New Page > MAIN Main Window
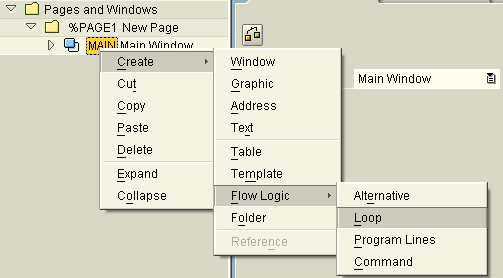
On the Main Windows right click and display context menu in order to loop on all rows in internal table gt_vbak to display header data of each SAP sales document.
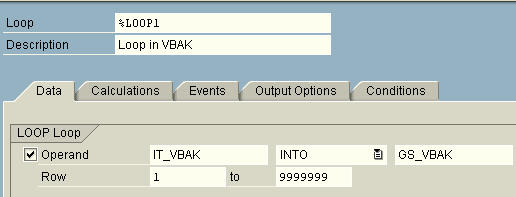
Give a descriptive name to the Loop Description text area.
On the Data tab of the Smartform Loop element, define the loop for each IT_VBAK row as follows.
On every turn of the defined loop, move each loop item into GS_VBAK vbak global structure or VBAK work area item.
Also set the Row range from 1 to a logical number for example 9999, etc.
Now we will create a data section which will show the SAP sales document number and the detail items of the VBAK row which maps to SAP VBAP records of the related VBAK header data.
First of all, we will create a text element under the Loop element node.
This text element will display the VBELN sales document number for each record of it_vbak selected in the loop.
Then we will add a table element in order to display the items of the loop item.
The last Smartform element which we will create on this Smartforms example document is Command element.
We will use the Command element in order to set page break between two vbak header records.
Below is the screenshot that the SAP Smartform elements of this example smartform.
Note that the descriptions of the smartform elements are given due to their respective tasks.
Now double-click on smartfoms text element and go to General Attributes tab.
In order to display a field value on the text element, click the Insert Field 
Now since I want to display the VBELN field, the sales document number on the text element, I type "&gs_vbak-vbeln&" and press Enter to set the text value to the vbeln field of the work area gs_vbak.
Note that if you want to display a field value on a text element, you should use the "Insert Field" button and on the Insert Fields screen, you should add "&" at the beginning and at the end of the field name.
After you press Enter, the work area field reference will be displayed as shown in the below picture.
Smartforms Table
Now, we will configure the Smartforms table component which is under the Loop node.
For Smarform Table configuration, go to Data tab.
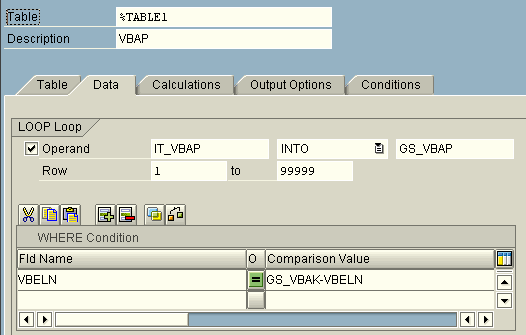
Since we will list Sales Document items from SAP table VBAP, note that I have moved IT_VBAP into GS_VBAP .
That loop in the table works for every row displayed on the smartform table control, and process each row from internal table it_vbap by moving into gs_vbap one by one.
Please pay attention to the WHERE Condition section of the configuration screen of Smartforms Table element.
VBELN = GS_VBAK-VBELN
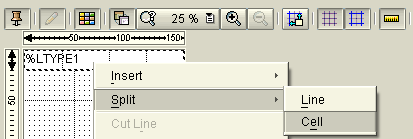
You can create cell spaces for GS_VBAK fields in the table rows manually.
Go to Table tab. And have a look at the below screen shot, showing how you can create cells for data fields by splitting cells and lines.
You will see the line type as %LTYPE1 . The next step will be creating Header and Main Area rows using the same line type %LTYPE1.
Let's see how we can add a table footer line into our SAP Smartform report.
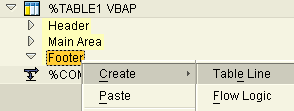
To add a line into out table, we will right-click on Header, Main Area or Footer sections.
And then select the following context menu : Create > Table Line
Select the line type from the dropdownlist. This table line has a type structured as the main table area.
After the footer row creation, expand the ROW node. You will see cell nodes created according to the line type as follows.
To add text on table footer, select Create > Text on the context menu which will open with a right click on Cell element.
To add static text on the footer cells, go to General Attributes tab. Write free text on the text editor.
Just as in the same way illustrated above in this tutorial, SAP Smartforms developers can easily add Header text to their TABLE elements.
Now let's continue our Smartforms tutorial with Main Area of sample smartform.
When you choose the Line Type and set to "%LTYPE1" the cells will be automatically created.
On any cell you can right click and add a new textbox by Create > Text in order to use it as a container for the related internal table field value.
As we did earlier in this Smartforms tutorial, you should navigate to the General Attributes of the smartform text element. Then click to Insert Field and on the displayed dialog screen you should enter the structure or workarea field name surrounded by "&" characters. For example : &gs_vbak-vbeln&
Smartforms Page Break by Command Element
The last step in this Smartforms tutorial where we are building our first SAP Smartform document, we will finish this example by adding page break between two SAP Sales Document.
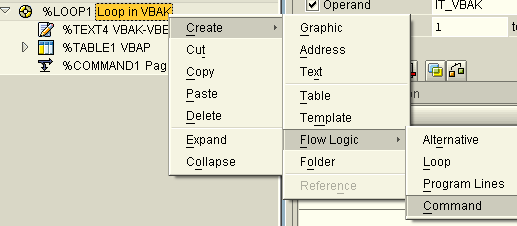
In order to add page breaks between two header items, we will add the page break by adding a Command element under the Table element.
You can add the Command element by opening the context menu on the Loop item following Create > Flow Logic > Command.
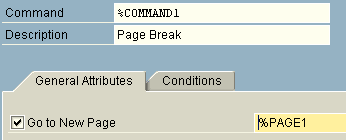
After you add the Command element, on the General Attributes check the "Go to New Page" checkbox.
When you check the "Go to New Page" and select the current smarform page "%PAGE1" itself again, this will enable Smartforms developers or ABAP developers to place pagebreak after table data just before the next SAP VBAK Sales Document header.
When you execute the SAP Smartforms to display the smartform, you will see that there is one blank page at the end of report.
We can handle not to place empty page for our example smartform by using the Conditions tab. This is a topic of an other SAP Smartforms tutorial.
But the trick is to get the number of header rows in the Global Definitions > Initialization tab and store it in a variable. Then we will use the Conditions tab for the Page Break Command element to check if the last header is reached or not.
Unless the last item is not reached, set the condition to place page break by going to a new page.
I hope you find this step-by-step SAP Smartforms tutorial useful as a Smartforms example.

